
The MiSTer is an open source project to simulate a variety of old school platforms. Note that it simulates, not emulates these platforms, in that it uses an fpga chip to mimic exactly the underlying logic of these platforms and not a software layer to imitate the behaviour of the system. For example, when emulating an Amiga A1200 on a PC, a software layer translates any calls to the Amiga hardware to x86 calls. As you might imagine, such translation requires quite a fast x86 system relative to the original A1200 system due to the very custom hardware being emulated. However, when simulating an A1200, no such translation takes place. The underlying hardware appears to the software as if it is an actual genuine A1200 system. A genuine 680×0 CPU is there. Alice, Lisa, and Paula are there just as the software expects, logically correct and accurate, complete with all the capabilities, limitations, and flaws that the originals had. The only difference is they are all programmed into one reconfigurable chip.
Speed and complexity are the biggest two considerations; the underlying fpga SoC needs to be large enough to accommodate the logic, and fast enough to run them at full speed. This is why the MiSTer can simulate a variety of platforms excellently, but with a rough complexity and speed ceiling meaning a 486 or NeoGeo is about your limit. Each platform in the world of MiSTer is known as a core.
In brief, short of running genuine, original hardware, this is the closest you will get to running the real thing, and given the prohibitive cost of many retro systems these days this is a good enough solution for most.
Kit
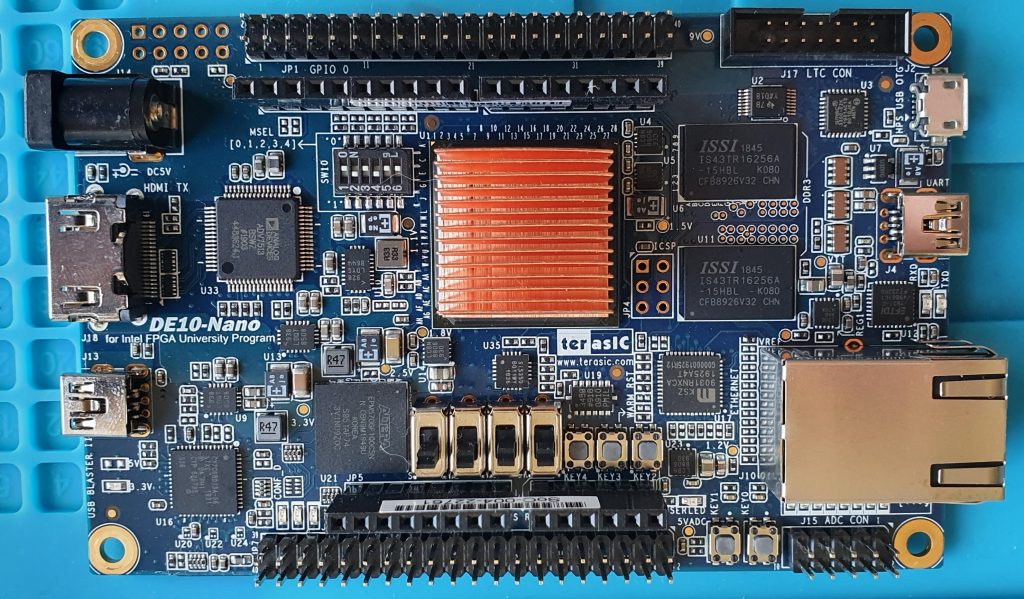
The MiSTer project is currently based on the Terasic DE10 Nano board. This is a SoC dev kit intended for educational purposes and small projects. It’s a lot like a Raspberry Pi in that regard, and the DE10 does actually use an ARM Cortex A9 for management and i/o running a variant of Linux. The DE10 itself is just potentially far more powerful and flexible thanks to the CycloneV fpga.
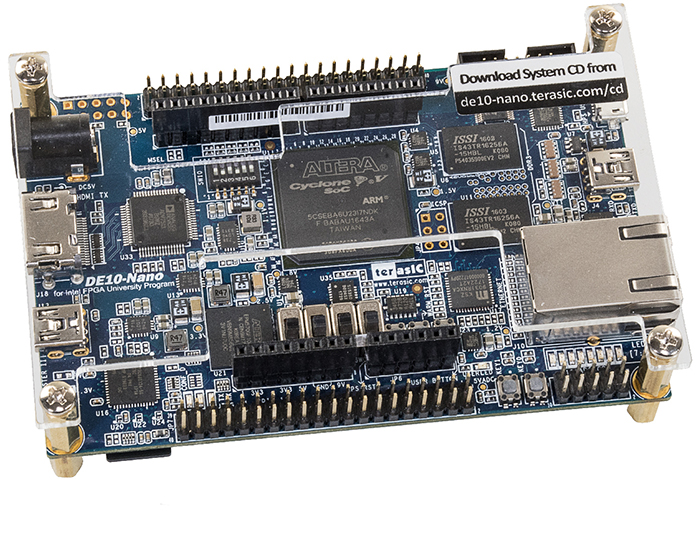
As you can see above it’s as much as you’d expect for a dev board. CPU, RAM, i/o in the form of USB, HDMI video, uSD local storage, GPIO headers etc. As it stands it is suitable for small projects. However, for the full MiSTer experience, you will need some extras:
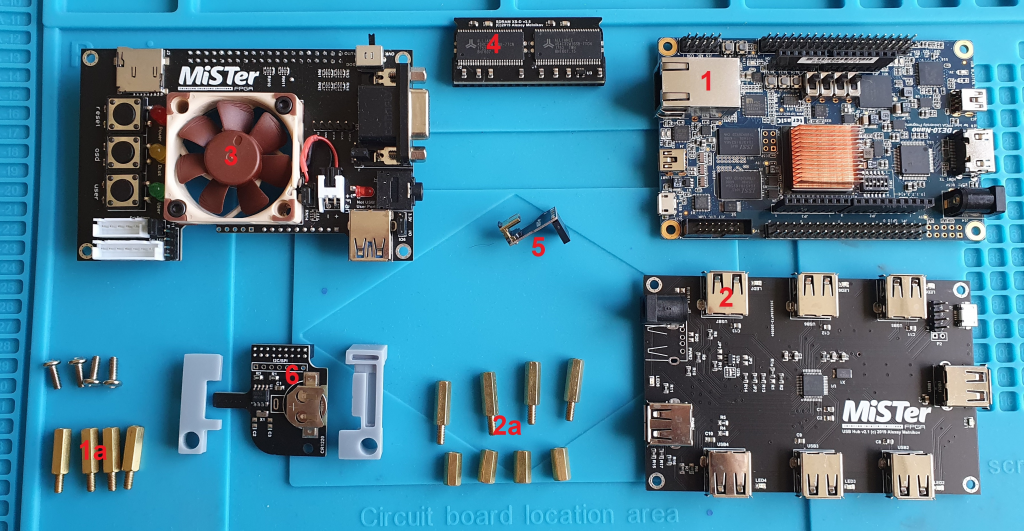
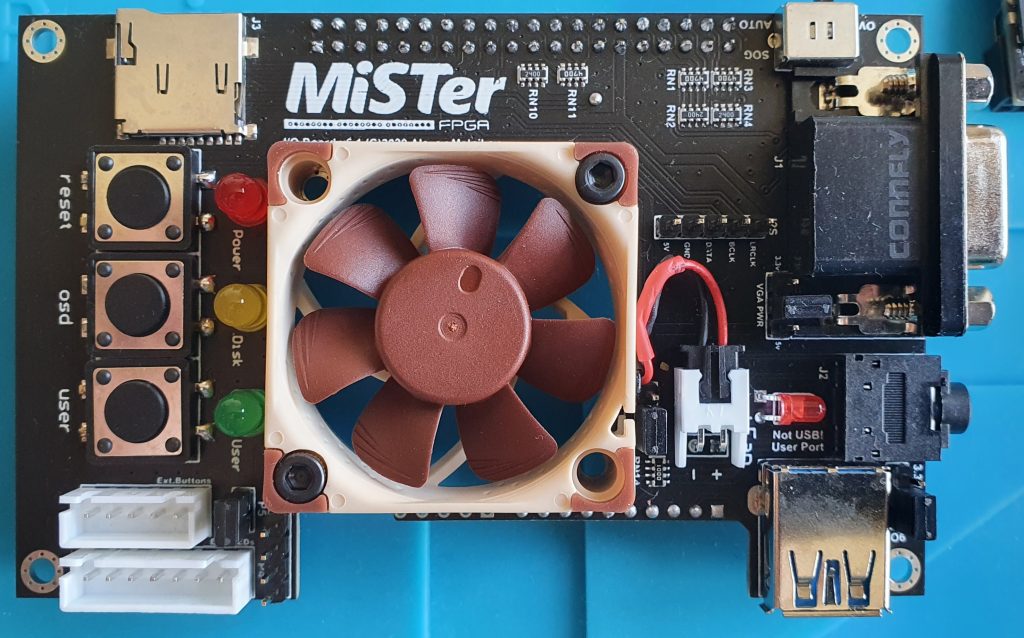
- The DE10 Nano board. In this picture, the acrylic shield that the board ships with has been removed and a copper heatsink attached
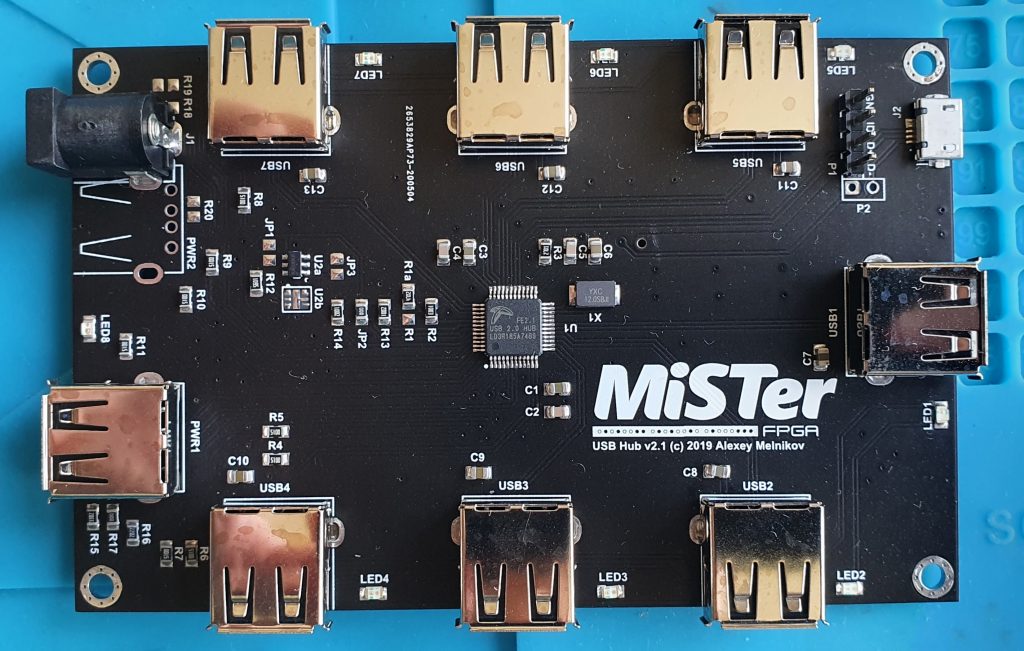
1a. The screws and risers that come attached to the DE10 - The USB hub v2.1 board
2a. The screws and risers that are supplied with the USB hub board - The MiSTer I/O board v6.1 with a 40mm Noctua fan (NFA4x10)
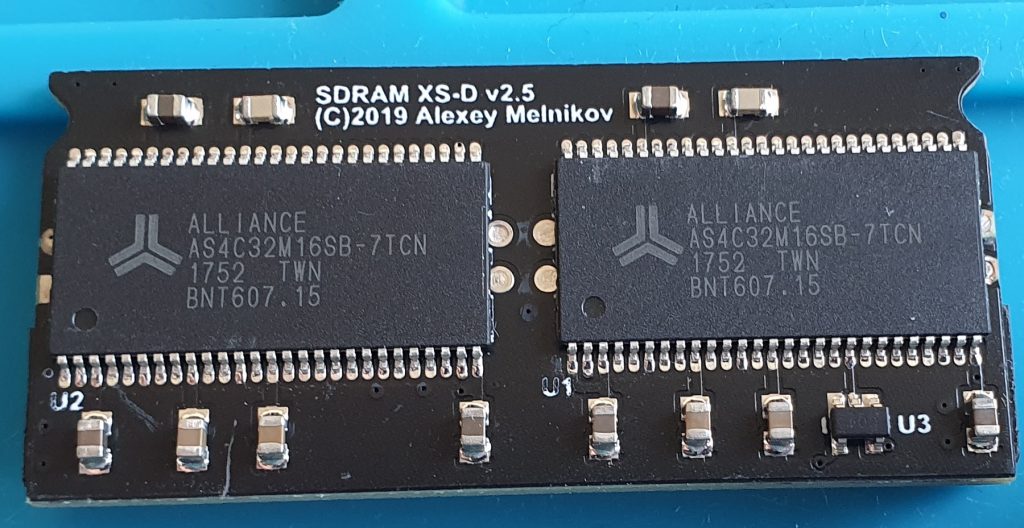
- A 128MB SDRAM board
- The micro USB bracket hub connector
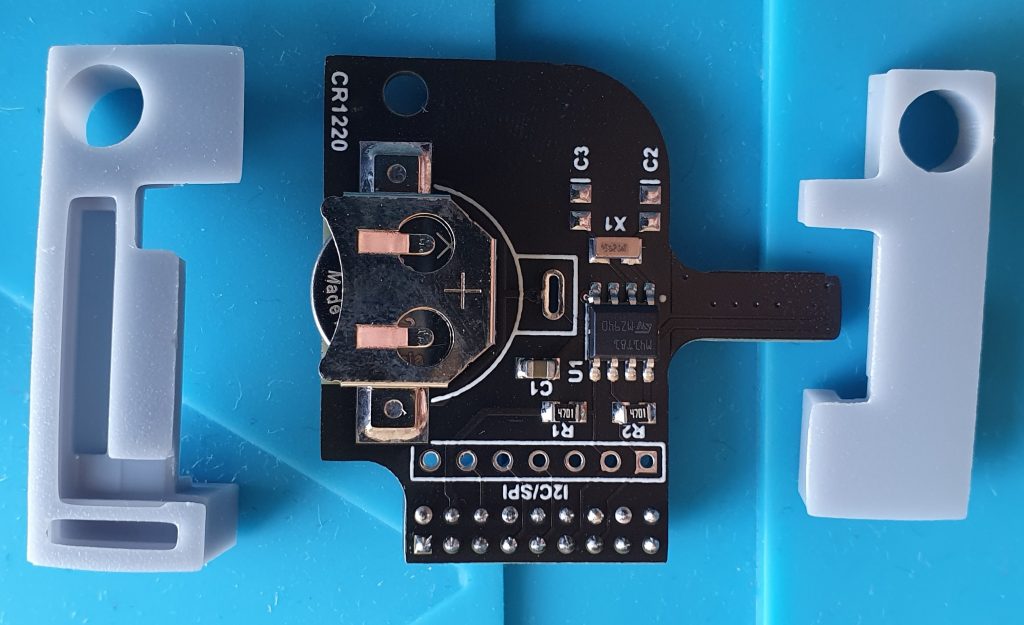
- The RTC with battery
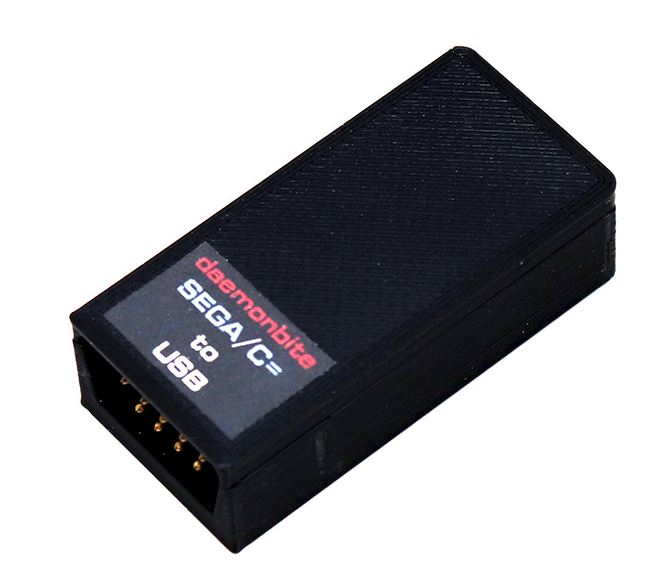
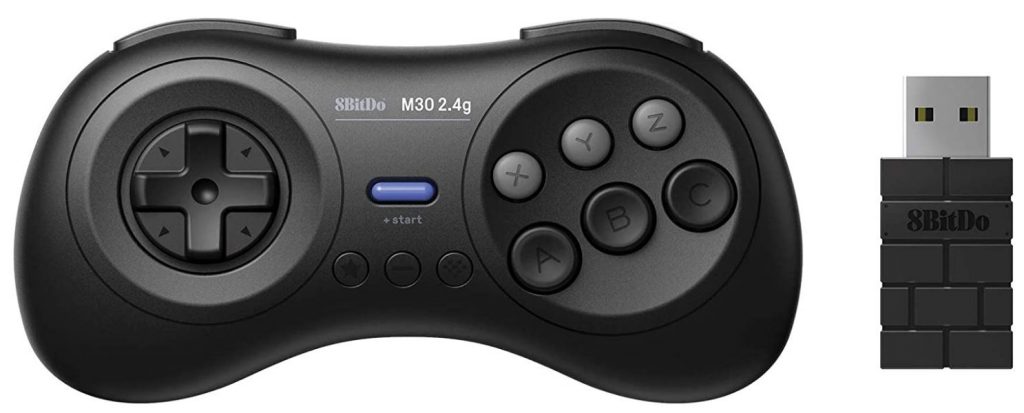
Pictured above are the Daemonbites MegaDrive to USB adaptor, the 8bitdo M30 2.4g controller with it’s USB wireless dongle, and the 8bitdo MegaDrive 2.4 adaptor. More on those later.
Not pictured is a keyboard. Basically whatever you’ve got spare will do.
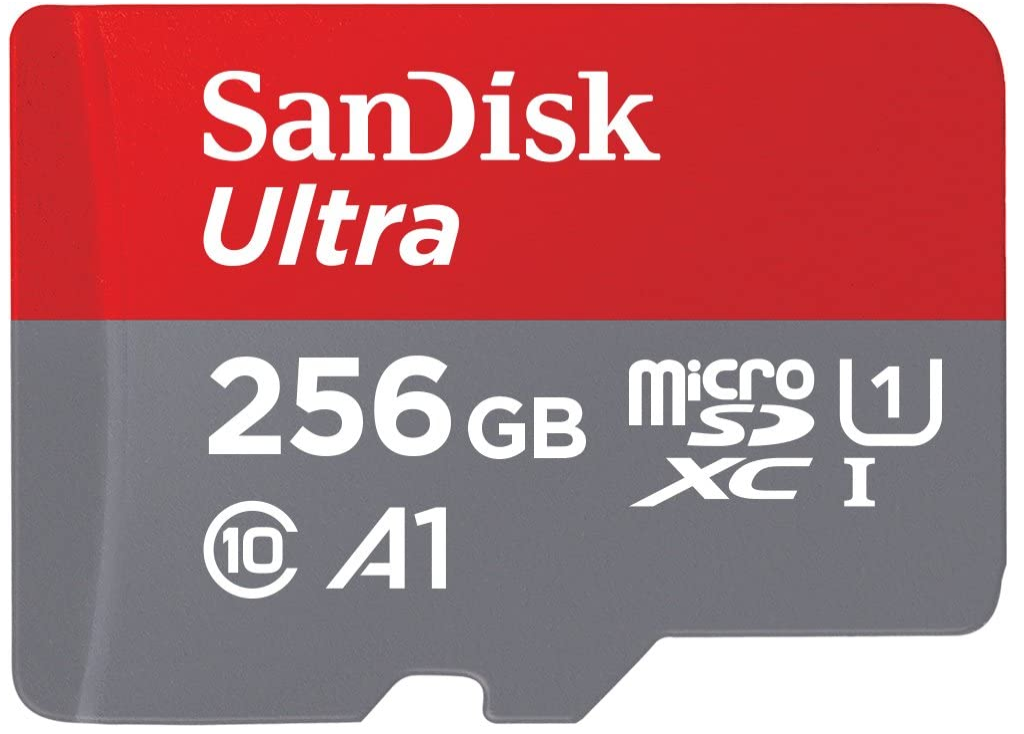
As for storage, the DE10 comes with an 8GB uSD card. This is enough to get things going. All cores will install and you’ll still have room for complete CPC or GameGear libraries. But for sizeable SNES or MD libraries you’ll want more, for larger games like MegaCD you’ll need more, and for hard drive files for the Amiga, 486, or other cores you’ll definitely want more. I went for a 256GB SanDisk Ultra uSD card. It’s known to work well.
Not all of these parts are strictly necessary to get up and running on a more limited budget, but I would consider these what you’d want to be up and running and comfortable for some time to come.
Details
The DE10 board is a core essential. Without it, you’re basically going nowhere.
I’d also consider a heatsink of some description essential to ensure longevity of your DE10. The CycloneV can get quite hot when being reprogrammed and under use, so for the price it’s well worth it. There is a black anodised steel one available, but I prefer the bare copper.
I’d consider an i/o board essential. There are two choices:
- MiSTer i/o board v6.1 – VGA connector, 3.5mm audio jack with TOSlink, secondary SD slot
- MiSTer Digital i/o board v2.1 – On/off switch, mini TOSlink and digital TOSlink connector, secondary SD slot
So, get the analogue board if you want dual VGA and HDMI output. Use the digital board if you don’t need VGA, want more optical audio, and want to leave the GPIO pins available. For my money, I had vastly more use for analogue audio output and VGA than I had for TOSlink or leaving pins spare for an expansion that may never happen. And if it does, I can swap out easily enough.
Note that the i/o board appears to have a USB port on it. This is actually not a logical USB port, rather a breakout of six of the Arduino-compatible pins in a physical USB port. It’s intended for low-latency (32nS) serial communication with the cores for uses such as JAMMA connectivity, controllers such as mice and trackballs, or MIDI. Don’t try using this as a regular USB connection as it will not work.
The USB hub is the first non-essential bit of kit. By that I mean you can use an existing USB hub if you choose to, but this is the same size as the other PCBs and is known to just work.
The SDRAM module is pretty essential. I say that as you can get some things off the ground without it, but nothing much more advanced than the Amstrad or C64 cores. The extra RAM is needed for the Amiga and is absolutely essential for the new NeoGeo and 486 cores. Given that, there is a 32MB SDRAM module available that is a little cheaper and it will run everything but a few NeoGeo games, so the full-fat 128MB itself is currently only of fringe necessity.
The final part of the core build is definitely optional, but for me is a nice-to-have that I allowed myself; the RTC. This is not so useful to the MiSTer itself, and is only used by platforms that can make use of an RTC, and even then is only as useful as the correct time would be on that machine. Was an RTC module useful to us on the Amiga? Sure, kinda. But on the MegaDrive? Not really.
A last few things were more for convenience, needs will vary depending on use, but I considered these too essential to be skipped:
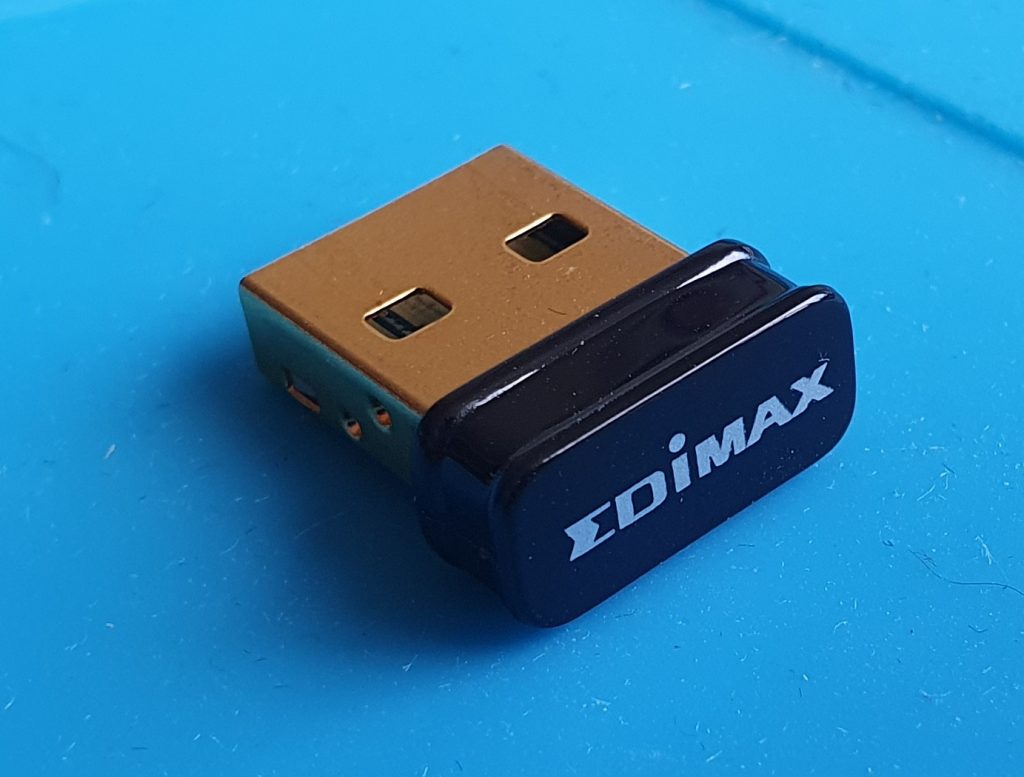
Unless you have a network socket close by, you’ll want wifi access. There are a few that are natively supported by the Linux build managing things. I bought an Edimax EW-7811Un and it’s worked flawlessly.
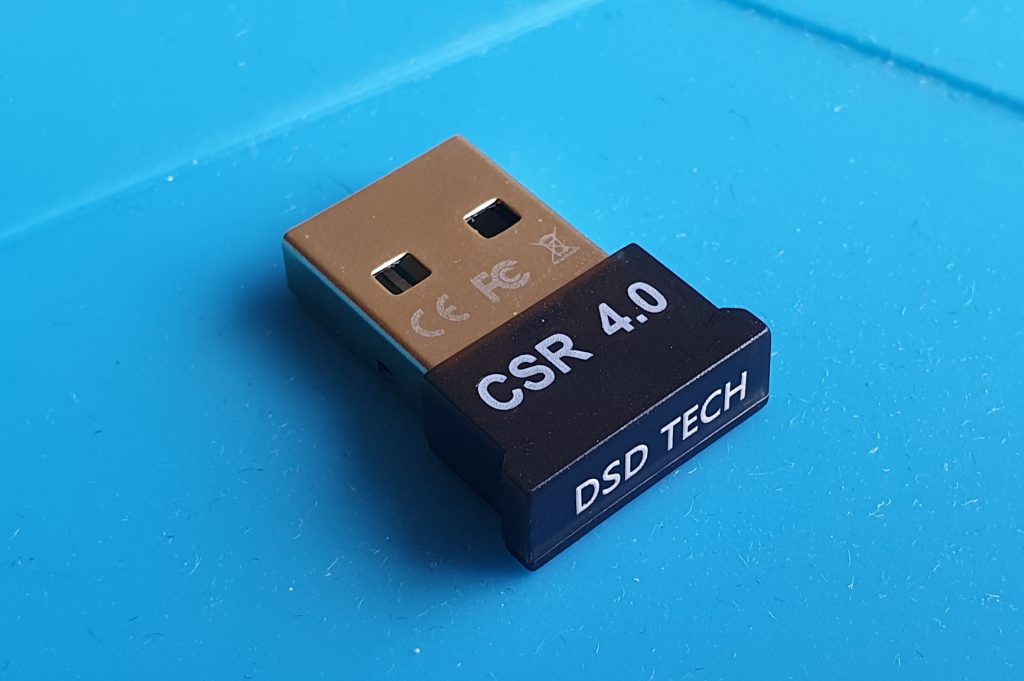
I also bought a bluetooth adaptor, simply because I had a spare BT keyboard. Any BT dongle with the CSR8510 chip is known to work well, so I got one of those.
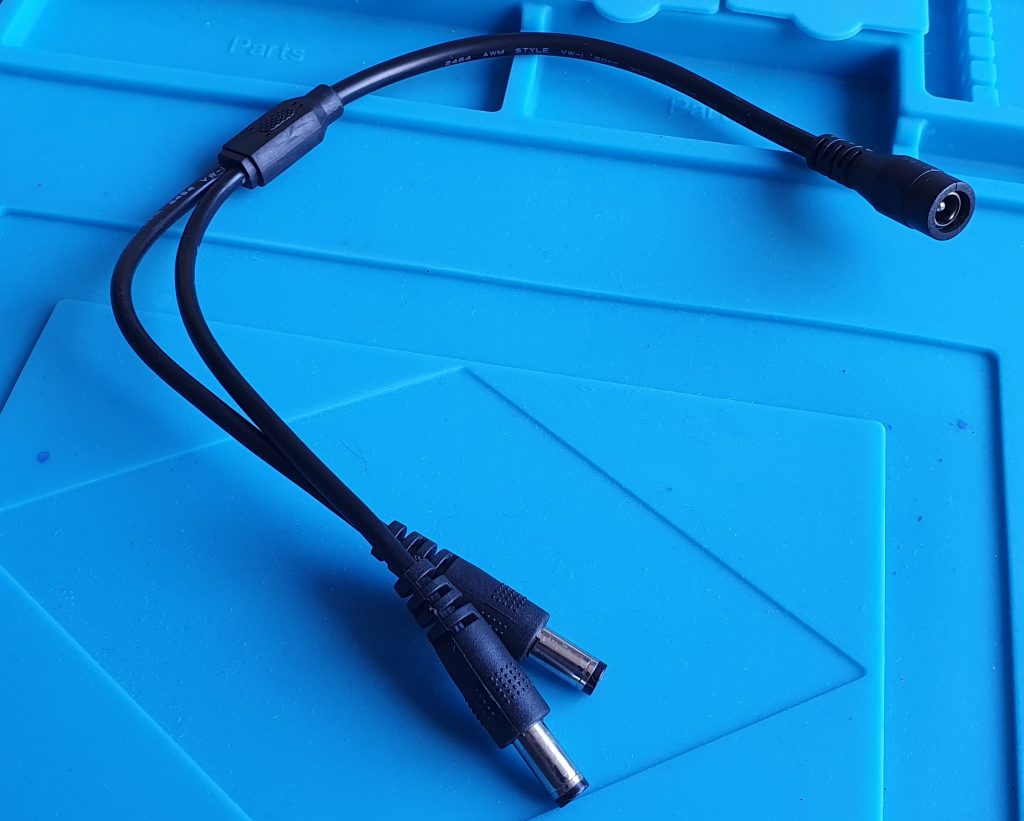
A power splitter cable is available. Under normal circumstances, the MiSTer will power the USB hub. However, the USB hub itself does come with a second barrel jack for power, the same as the DE10. Powering the USB hub independently of the DE10 board can ease strain on power circuitry, especially if you are wanting to support any higher draw devices such as an external HDD.
Also available is an uprated 5V/4A PSU. If you are getting one of these, I’d also highly recommend a splitter.
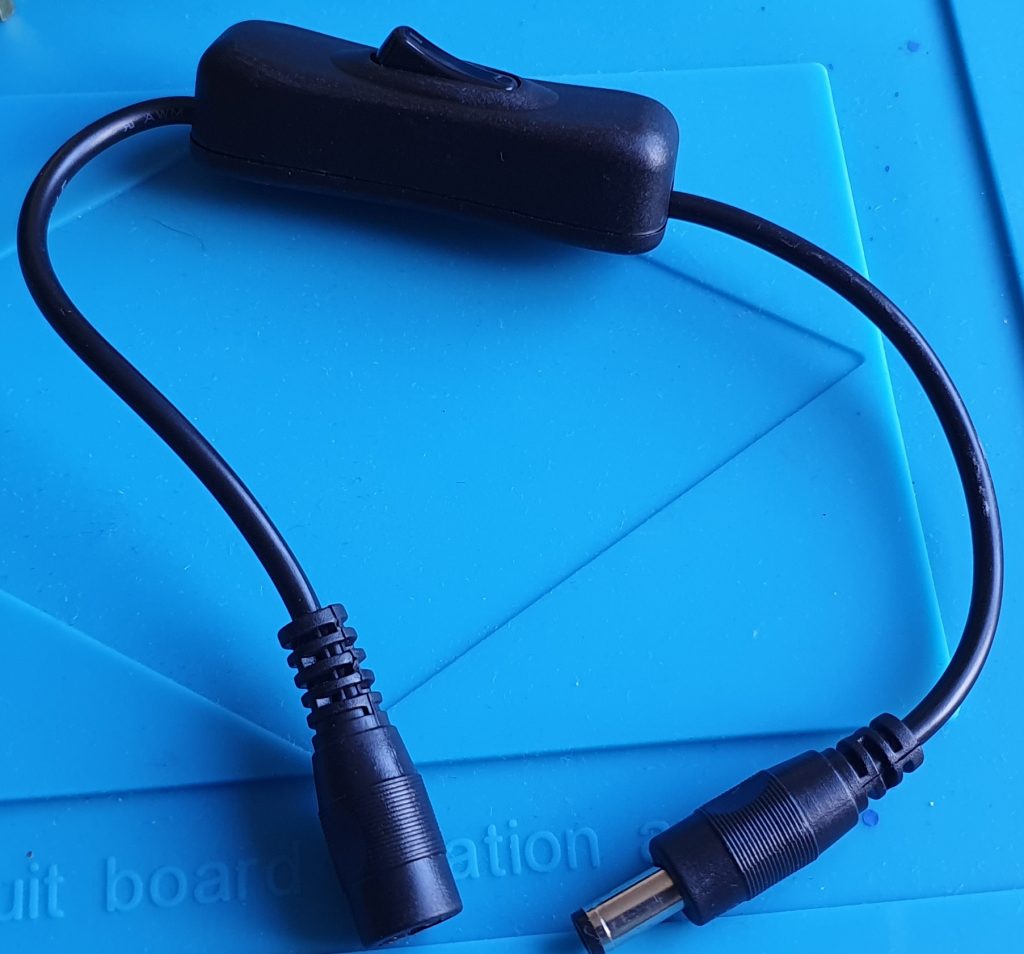
And lastly, a power switch. The digital i/o board comes with a power switch built in, but the analogue one does not. For the sake of convenience, an in-line power switch just saves you pulling plugs to switch the thing off.

Bluetooth dongle WiFi dongle Power splitter In-line power switch
Controls
The method of control is something up for debate.
Native USB controllers work, but there have been complaints about latency in some cores and some games under stock configurations.
One notch up from that is the fast USB polling config. This increases the polling rate on USB controllers to 1KHz, drastically reducing latency. This, in my opinion, will do for most users.
A small improvement on that is the solution I have gone for. Fast USB polling to a USB to MD adaptor from Daemonbytes, to an 8bitdo MD adaptor. That might sound like a bit of a faff, but it is slightly faster than the above solution and I wanted best-on-a-budget, and this seemed to be it.
Beyond this you have what in my view are drastically diminishing returns. The next level is SNAC adaptors. These are direct USB to original controller adaptors, for example USB to SNES, or USB to MS. These are very quick as they communicate direct to the cores, and nice to better simulate the original experience if you have the appropriate controllers handy, but note they are core-specific, and the number of cores that supports them is still limited.
The ‘best’ solution is a BliSTer board. This is a combination of a USB hub and a BlissBox, using LLAPI and custom BlissBox cables to use your original controllers and have them communicate directly with the relevant cores.
For me, the BliSTer was a cost too far. £70 for the board, plus adaptor cables that came to more than that again for a complete set was just too much. I’ve opted for the 8bitdo with Daemonbites solution. Is it measurably quick? Yep, there are stats out there. Is it’s latency different to that of an original console and controller? Looks that way, a little. But for me, hours into playtesting lot of games across a lot of platforms and comparing them to the original games on original hardware, I can’t tell the difference.
Costs
I sourced a lot of my kit from https://misterfpga.co.uk/. Nat, who runs the shop, could not have been more helpful. Orders were quick, kit was competitively priced, he answered my dumb questions, really couldn’t have asked for better.
For reference, costs good as of Sept.2020:
- Terasic DE10 Nano £118 (https://www.digikey.co.uk/)
- MiSTer i/o v6.1 board £57 (https://misterfpga.co.uk/)(£42 with standard fan)
- USB v2.1 hub £35 (https://misterfpga.co.uk/)(includes risers, connector, and power splitter)
- 128MB SDRAM £54 (https://misterfpga.co.uk/)(32MB is only £22)
- RTC module £16 (https://misterfpga.co.uk/)(comes with mounting shims and cell)
- Copper heatsink £10 (https://misterfpga.co.uk/)(Standard heatsink £3.50)
- 5V/4A uprated PSU £20 (https://misterfpga.co.uk/)
- 256GB uSD card £28 (www.mymemory.co.uk)
- DSD Tech Bluetooth £6 (Amazon)
- Edimax WiFi £9 (Amazon)
- 8bitdo M30 2.4GHz £24 (Amazon)
- 8bitdo MegaDrive to USB £15 (Amazon)
As you can see, it all adds up, but even rapidly closing in on £400 it’s still less than the cost of a couple of good condition original consoles, or these days, one decent A1200 with accessories! Plus you have the fact that the thing is tiny. Basically the size of a can of beans on it’s side it’s dwarfed by most old consoles.
Cut out all the extras and just get the DE10, standard fan i/o, 32MB SDRAM, cheaper heatsink and use your own USB hub and controller and you can probably get going for £190ish.
Next time: Building the thing
1 thought on “MiSTer 1.1: Intro and Hardware”